
Moringa oleifera is also referred to as the ‘miracle tree,’ is a highly valued plant because of its many nutritional and medical properties. The plant is packed with a range of nutrients, minerals, and bioactive components, making it among the best superfood we have today. Moringa leaf powder, which is very popular, has been found to treat many chronic health conditions.
In most stores, they are selling moringa leaf powder as a supplement. But you can make this powder at home if you have moringa tree leaves. The process of making the moringa powder is pretty simple to follow in this guide.
Below are six steps on how to make moringa powder from home:
1. Cut Moringa Branches
Start with cutting branches from a mature tree moringa tree. If it is your first harvest since planting, the plant should be at least 8 months old. The timing for the harvest and the leaf stage are two crucial factors to consider for quality powder.
Young moringa leaves are the most nutritious. The level of certain nutrients is also determined by the seasons. If you want high vitamin A, proteins, and carbohydrates content, harvest the leaves during hot-wet seasons. This could be somewhere around the end of spring and early summer.
For higher minerals such as vitamin C, iron, and phenolic, harvest during the cold-dry season. This kind of weather comes at the end of summer as we approach the fall season. These are crucial factors to consider when harvesting moringa leaves. Make use of a sharp knife when cutting branches to avoid wounding the plant.
2. Prepare Leaves For Drying
The drying of the leaves is one of the most important stages. If you get this wrong, the quality of your moringa powder will be very poor. You need to have in mind that you need a powder that will last to the next harvest, which is at least six months away.
The first step to drying the leaves is hanging them upside down by tying the base of the branch. The leaves should be dried away from direct sunlight. You can build a makeshift shade or hang them in your garage. Don’t forget to spray the leaves with clean water to wash off dirt and dust.
If you have harvested leaves during summers, it will not take long for them to dry and start falling off the branches. But if you have harvested moringa leaves during the humid and cold season, you can use electricity or gas dryers to dry them. It is recommended that you put a sheet, maybe a paper sheet, at the bottom of the branches to collect falling leaves.
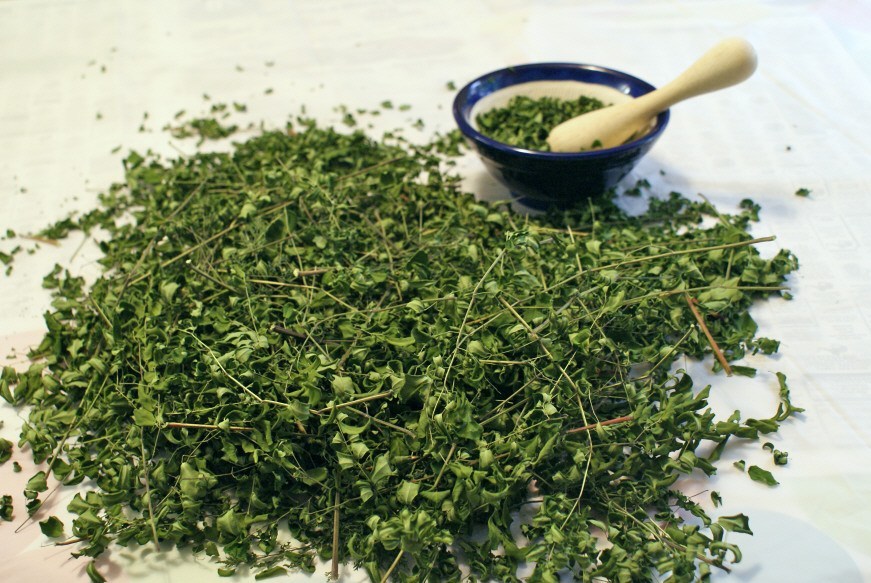
3. Collect Dry Leaves
With the dry leaves falling, you need to collect them for proper storage. The process might take some days because each leaf falls when it’s dead and detached from the stem. Collect the leaves in bowls or a sheet. There are several things you need to consider when collecting leaves to ensure good quality powder.
One of them is the sticks. As the leaves fall off the branches, they may detach even with sticks. You need to remove these sticks for a smoother powder. Doing this during the collection makes work easier for the subsequent steps.
Water content in the leaves is also another essential factor to consider. If the leaves still have some water in them, then the quality of the powder will be poor. The powder will not last for long without going bad because of the molds. Now, the leaves are ready to be turned into powder.
4. Blending
With your moringa leaves properly dried, it’s time to blend them while still green. You just need your home blender or grinder to turn them to powder. Grind in small batches to ensure a thorough breakdown of leaves to a finer powder. However, the size of the grinder would be a crucial factor in determining powder fineness.
If you don’t have a grinder or blender, you can use a stainless steel hammer mill. It will pound the leaves to produce a fine powder. Some people still use home-made manual blending techniques for small amounts of moringa powder. So, you have all the options for making this powder.
5. Sieving And Refining
The blending stage will not provide you with a powder you can be put in the tea. The kind of powder you get has sticks and large matters that couldn’t be broken down by the blending blades or the hammer mill. That’s why you need to strain and refine it smoother powder.
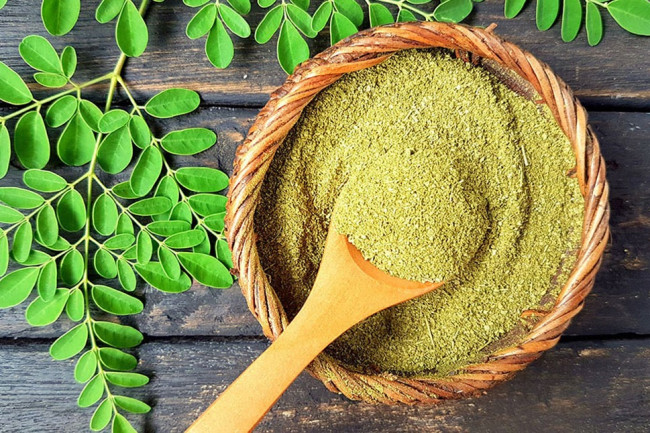
Use a strainer to help sift out any unwanted sticks and large matters in the powder. You can have different strainers depending on the smoothness you are looking for. For the very fine powder, the particle size should be between 0.2mm and 0.5mm. What you will be left with is a fine green powder that’s ready for packing and use.
6. Packing and Storage
The last step of making moringa leaves powder is packaging and storage. Now that you have got the grade of the powder you wanted, you need to package and store it properly. Moringa powder can easily be contaminated by mold if exposed to moisture. This means you need to store it in a sealed container or use a vacuum sealer.
Store the powder in a cool, dry place away from the sunlight. Do note that exposure to warmth and sunlight can cause a breakdown of nutrients in moringa. To reduce exposure to moisture and bacterial, pack it in many small containers instead of one big container. You can also use multiple zip locks for packaging.
Conclusion
You don’t have to spend money to enjoy the health and medicinal benefits of moringa oleifera. You can make your own powder at home if you have a moringa tree plant. Follow these easy steps to make moringa leaves powder that will retain its quality for a whole year.


